![]()
![]()
![]()
![]()
![]()
![]()
![]()
![]()
![]()
![]()
![]()
![]()
Creating your second card
You can now create your second card. It will be the main menu for your stack. When you have finished this exercise your main menu card will look similar to the one pictured in Figure 25.
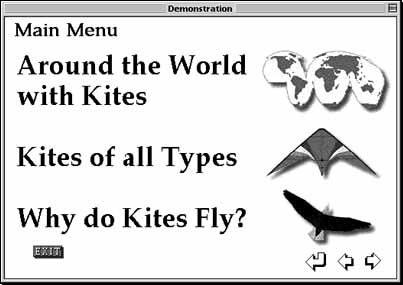
Your Main Menu card will include the following features...
- It will become a "Group Card"
- Four buttons (group objects)
- Two text objects
- Three examples of clip art
This card will become a group card. A group card allows you to share objects and elements with other cards. This can save you a great deal of time and effort.
![]()
For example each time you make a new group card the objects and elements that you "grouped" on the previous card will automatically appear on the new group card.
The four button objects you will create on this Main Menu card will be made as group objects. As a result they will appear on each of your following group cards as you create them.
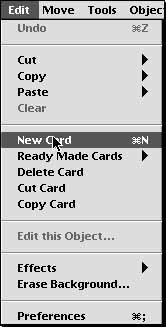
27. Select "New Card" from the Edit menu (Figure 26). A new blank card will appear.
![]()
28. Using the skills you acquired above create two text objects. In the first text object type the words "Main Menu". In the second text object below type the three menu choices illustrated in Figure 25 above.
29. Import the three examples of clip art icons from the Tutorial Resources folder and place them alongside each menu item.
30. Create four new buttons.
They are illustrated in Figure 25 above. These are the characteristics for your four buttons:
|
Type |
|
Invisible |
|
Show Name |
|
Unchecked |
|
Show Icon |
|
Checked |
|
Highlight |
|
Checked |
|
Transition |
|
Fastest |
|
Features |
|
Group (Refer Figure 28 below) |
|
Sound |
|
Click |
|
Icons |
|
Refer Figure 25 above. |
|
Name |
|
Action (Refer Figure 29 below) |
|
Exit |
|
NBA (MenuChooser) |
|
Go back |
|
Back |
|
Previous |
|
Previous Card |
|
Next |
|
Next Card |
![]()
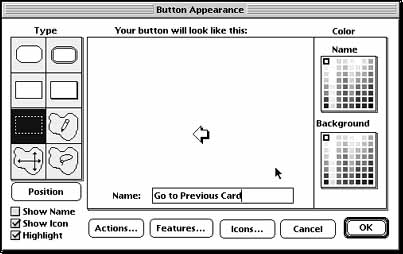
Creating your four buttons will be similar to your work in creating the "Begin" button on your first card. There are only two new skills to be learnt this time:
- Creating group objects.
- Using a "NBA" ... New Button Action
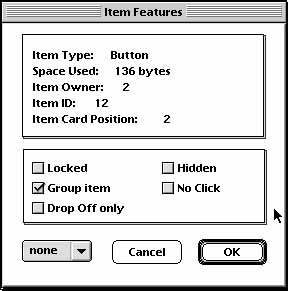
31. Creating a Group Object. Simply click on the Features button in the Button Appearance dialogue box for each button in turn. Check "Group Item" in the Item Features Dialogue box (Figure 28) and then click "OK".
![]()
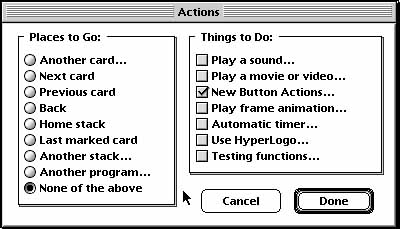
32. Using a NBA (New Button Action). On the Main Menu page you are required to create an "Exit" button. This will allow you to quit HyperStudio. When you are creating this button follow the following steps in order to include a new button action. In the Actions dialogue box of your "Exit" button click "New Button Actions" (Figure 29).
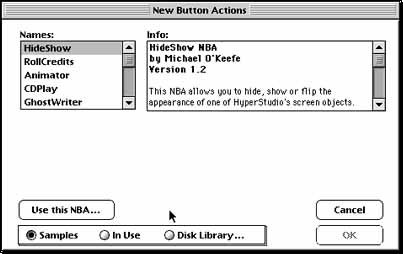
The "New Button Actions" dialogue box will appear (Figure 30). We are looking for an action already included in another HyperStudio stack. The New Button Action is called MenuChooser and it is located in the HyperStudio stack called "Quit".
![]()
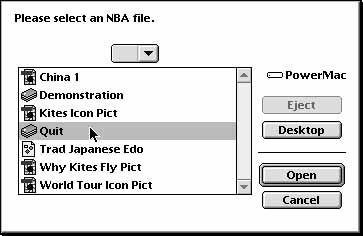
33. Click on the Disk Library button found at the bottom of the "New Button Actions" dialogue box (Figure 30). A dialogue box will appear allowing you to find the "Quit" file (Figure 31). Locate the Quit file in the Tutorial Resources folder and click "Open".
![]()
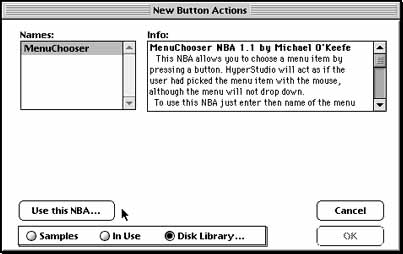
34. Once you have clicked on the Quit file and selected "Open" the New Button Actions dialogue box will list the MenuChooser NBA (Figure 32). This New Button Action allows you to make any of your buttons perform an action normally associated with a menu. Click on the "Use this NBA" button.
35. The additional window will appear (Figure 33). You are required to type in the name of the menu and the action you require. We want our Exit button to Quit HyperStudio so you need to type in:
File,Quit HyperStudio
Note: There is no space after the comma.
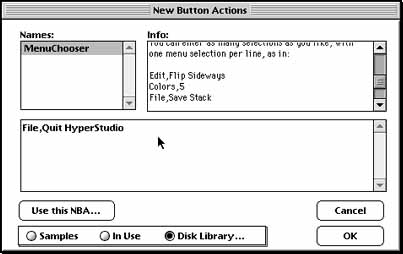
The Exit button will now allow you to quit from HyperStudio.
![]()